
Opening Observations to Generate Questions About "Size of Objects in Images" / Plotting Observations About Angular Size
Overview: Students observe everyday objects, and take their own images of objects to explore the factors which affect how large they look in an image taken by a digital camera.
Explanations of Trick Photos
Overview: Show observations about Earth-bound objects to motivate how "size in an image" is affected by actual size of object and distance from the detector.
Electronic resources: images referred to below.
Physical resources: None
Each group of youth is assigned one "trick photo" or video. They develop 2 explanations (models) for what they see in the observation, and share on the board with the class.
Trick photography:
Astronomy images (for discussion below)
Instructor discusses:
- What words do we use to describe these models? Point out "size," "distance," "bigger," "smaller" in their descriptions.
- What do we mean by "size"? Is that specific enough? (width, length, radius, height, depth, etc. but also volume and mass).
- Why are we fooled by these images, but not if we were standing next to them? The important idea is that actual (linear) size and distance from detector affect how big something looks in an image.
- Introduce the images of Mars at different distances or eclipse of the Sun: How are these images similar to the trick photos?
Teacher tips/tricks:
- If students have difficulty understanding what is meant by 2 alternative models, have them think about what the actual real situation would look like from the side, if we could step out from behind the camera that took the image.
- Timing could be around 30-45 minutes.
Assessment:
- Ask how the images of eclipses of the sun are similar to the trick photos, and have students record.
- Eclipses: how could you make Martian solar eclipse look like Earth Solar Eclipse? (i.e. change distances or linear radius of either of the Moon or Sun.)
Image Challenge: Same Size in Image
Overview: Students take images with digital cameras to make objects of different linear size look the same angular size in an image, using what they know about the effects of linear size and distance on how 'big" an object looks in an image. Students plot these observations to investigate the relationship between linear size, angular size and distance.
Electronic resources: None
Physical resources: digital cameras with screens covered in plastic wrap, computers, objects (blocks?) of differing width, meter sticks.
As a group, review the important things that cause objects to look a different width in an image: actual width and distance from the object to the detector.
Draw analogy between telescope and digital camera: both collect light and create an image that is recorded electronically by a detector.
Challenge: (Instructor demonstrates the first measurement)
- Cameras have two vertical lines, drawn a short distance (max 1/3 of screen) apart on viewscreen. (Taping over the viewscreen with plastic wrap and drawing the lines on the plastic wrap will save damage to equipment.)
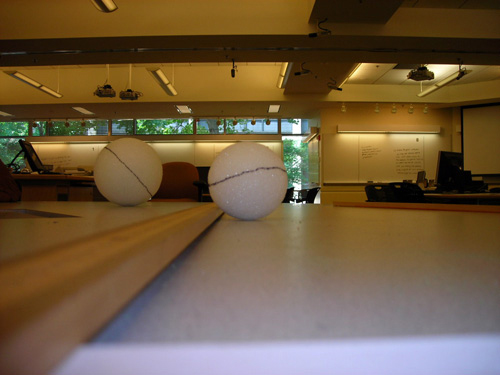
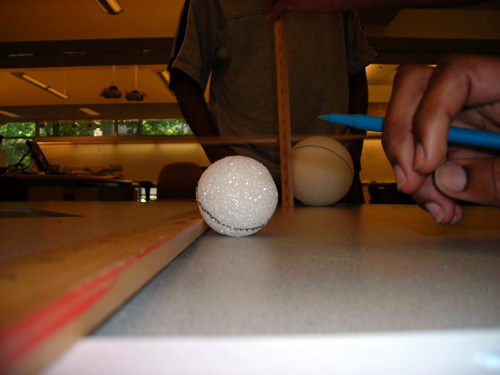
- Take images of three different width objects, but make them fill the distance between those lines on the viewscreen. Example images taken by students: ball angular size, ball angular size 2, ball angular size 3
- Record the important information about those three objects: actual linear width and distance to detector. Give an example data chart on board.
Demonstrate: Instructor makes a plot with Excel. (linear size = x, distance from detector = y) Students repeat and save file. Print if possible, and tape into notebook, along with images of the three objects.
Demonstrate: Instructor represents these observations in his or her notebook as a chart, plot, in pictures, a labeled diagram/drawing, and then words to describe the pattern. Students repeat in their own notebooks.
Discuss: These are all valid ways to represent our observations, and gives a complete picture of what we did. We have just observed the patterns involved in the situation "different width objects look the same width in an image."
Teacher tips/tricks:
- Timing: could be done in about 1 hour.
- Alternative: Balls can be used instead of blocks, instead drawing a circular "target" on the camera screen, but linear width is an easier way to connect to angular width in the next activity, where strings actually demonstrate the angle which is the size of the object in the image.
- Describing the pattern of data in words is especially important, as it sets the stage for the algebraic relationship developed in the next activity.
- Use the students' words for "size in the image", holding back on introducing "angular size" until the next activity.
- If desired, instructor can take JPEG images of objects (or have students do so), and convert JPEG to FITS, using this online image converter utility: Image Converter.
Assessment: None